
Is your Apple Watch refusing to update? You’re not alone. Millions of Apple Watch users face update issues every year. But don’t worry, there’s usually a simple fix.
Your Apple Watch, like your iPhone, needs regular software updates. These updates fix bugs, add new features, and keep your device running smoothly. But sometimes, things don’t go as planned.
There are several reasons why your watch might not update. It could be a connection issue, low battery, or not enough storage space. Whatever the cause, it’s frustrating when your smart device isn’t so smart.
In this article, you’ll find easy-to-follow steps to get your Apple Watch updated again. We’ll cover common problems and their solutions.
By the end, you’ll know exactly what to do when your watch won’t cooperate. Let’s get your Apple Watch back on track!
Troubleshooting when your Apple Watch won’t update
Sometimes, your Apple Watch just won’t update, even when your iPhone is up-to-date and your watch is fully charged. Don’t worry. It happens to many users.
Let’s walk through some steps to fix this issue.
Step 1: Restart your Apple Watch
First, try giving your watch a fresh start. Here’s how you can restart it:
- Press and hold the side button until you see new options.
- Tap the power icon in the top right corner.
- Slide the power off slider to the right.
- Wait about 30 seconds, then press and hold the side button again until you see the Apple logo.

Step 2: Unpair your Apple Watch from your iPhone
If restarting didn’t work, let’s try unpairing your watch. Don’t worry. It’s not as drastic as it sounds. Here’s what you need to do:
- Open the Watch app on your iPhone.
- Tap the ‘My Watch‘ tab, then ‘All Watches‘ at the top.
- Tap the info icon next to your watch.

- Select ‘Unpair Apple Watch‘.
- Confirm by tapping ‘Unpair [Your Name’s] Apple Watch‘.

Remember, this will reset your watch to factory settings, so it’s crucial to back up any important data first, just as you would when troubleshooting other Apple devices.
Step 3: Pair your Apple Watch with your iPhone again
Now that you’ve unpaired your watch. Let’s reconnect it:
- Turn on your Apple Watch by pressing the side button.
- Open the Watch app on your iPhone.
- Tap ‘Start Pairing‘.
- Hold your watch up to your iPhone’s camera to pair, or choose ‘Pair Manually‘.

- Choose ‘Restore from Backup‘ or ‘Set Up as New Apple Watch‘.
- Follow the on-screen instructions to complete the setup.

After a few minutes of syncing, your watch should be ready to go. This re-pairing process often solves update issues.
By following these steps, you should be able to get your Apple Watch updated again. If you’re still having trouble, don’t hesitate to reach out to Apple Support for more help.
How to fix the “Unable to Install Update” error on your Apple Watch
Sometimes, your Apple Watch might refuse to update, showing an “Unable to Install Update” error.
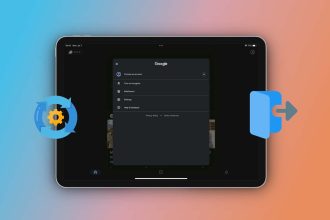
1. Turn off the iPhone unlock feature
Your watch’s ability to unlock with your iPhone can sometimes interfere with updates. Here’s how to turn it off:
- Open the Watch app on your iPhone
- Go to the My Watch tab
- Tap Passcode
- Toggle off Unlock with iPhone

2. Let your watch update overnight
Setting your watch to update while you sleep can often solve the problem without any fuss. Your watch will update automatically while it’s charging overnight.
3. Update using cellular (if your watch has it)
If your watch has cellular service, you can try updating directly on the device:
- On your iPhone, turn off both Bluetooth and Wi-Fi.
- This will force your watch to use its cellular connection for the update.
After the update finishes, don’t forget to turn the “Unlock with iPhone” feature back on if you use it.
These steps can also help if you see an “Apple unable to check for update” error. Make sure your Wi-Fi connection is strong, and try restarting your watch if you’re still having trouble.
Let your Apple Watch update itself overnight
Sometimes, the easiest way to solve update issues is to let your watch do the work while you sleep. Here’s how you can set up automatic overnight updates:
- Open the Watch app on your iPhone.
- Tap the My Watch tab.
- Go to General.
- Select Software Update.

- Tap Automatic Updates.
- Toggle the switch to turn it on (it should turn green).

Now, all you need to do is make sure your iPhone is connected to Wi-Fi and your Apple Watch is on its charger near your iPhone when you go to bed.
Your watch will take care of the update while you sleep.
This hands-off approach often solves update problems without you having to do anything else.
It’s a simple way to keep your watch up-to-date without any hassle.
If you wake up and your watch still hasn’t updated, you can try some of the other troubleshooting steps we’ve discussed.
But for many users, this automatic update feature does the trick!
What you need to update your Apple Watch
Before you start updating your Apple Watch, there are a few things you need to check. These simple steps will help make sure the update goes smoothly:
1. Update your iPhone first. Your iPhone needs to be up-to-date before you can update your watch. Make sure you’re running the latest version of iOS on your phone, which often includes important security updates and performance improvements.
2. Charge your watch. Your Apple Watch needs enough power to complete the update. Make sure it has at least 50% battery life before you start. It’s even better if you can keep it on the charger during the update.
3. Connect to Wi-Fi. Your iPhone needs a good internet connection to download the update. Connect to a reliable Wi-Fi network before you begin.
4. Keep your devices close. During the update, your watch and iPhone need to stay in touch. Keep them next to each other throughout the process.
By taking care of these basics, you’re setting yourself up for a successful update.
If you run into any problems after this, you can try the troubleshooting steps we talked about earlier. Remember, keeping your devices updated is important for getting the best performance and newest features.
How to update your Apple Watch correctly
While automatic overnight updates are convenient, sometimes you might want to update manually.
- On your Apple Watch, open the Settings app.
- Tap General.
- Select Software Update.
- If an update is available, tap Install and follow the instructions on your screen.

It’s a good idea to check for updates regularly. This way, you’ll always have the newest features and improvements as soon as they’re released.
Remember, if you see messages like “unable to install update” or “unable to check for update,” you can try the troubleshooting steps we discussed earlier.
These include restarting your watch, unpairing and re-pairing it with your iPhone, or letting it update overnight.
As a last resort, you might need to do a factory reset. But only consider this after you’ve tried everything else.
If you’re still having trouble, don’t hesitate to reach out to Apple Support for help.
The takeaway
Updating your Apple Watch doesn’t have to be a headache. Many users face update issues, but there are simple solutions at hand.
The key is to prepare properly. Make sure your iPhone is up-to-date, your watch is charged, and both devices are connected to Wi-Fi.
If you run into problems, try restarting your watch, unpairing and re-pairing it with your iPhone, or setting it to update overnight.
Contrary to what some might think, you don’t need to be tech-savvy to keep your Apple Watch updated.
The process is designed to be user-friendly, and automatic updates can do most of the work for you.
Remember, keeping your Apple Watch updated isn’t just about fixing bugs. It’s about unlocking new features and improving your overall experience, including enhancing the accuracy of health and fitness tracking.
So don’t put off those updates. A few simple steps can keep your watch running smoothly and give you access to the latest and greatest Apple has to offer.
We’d love to hear about your experience updating your Apple Watch. Share your thoughts in a comment below!


