
Ever had your AirPods Pro suddenly stop cancelling noise on just one side? Yeah, it’s annoying. You’re trying to relax, maybe on a flight or in a noisy café, and suddenly one earbud just gives up. It feels like someone opened a door to all the chaos, in just one ear.
This kind of issue is more common than you think. One second, everything’s quiet, and the next, you’re distracted by sounds sneaking in through that one ear. What causes it?
Well, it could be something as simple as earwax or dust blocking the sensors. Or maybe it’s a software glitch, a setting gone wrong, or even a bit of physical damage after a drop.
Now, why should you care? Because when you buy AirPods Pro, you expect seamless sound and working noise cancellation on both sides. It’s part of the experience you paid for.
When one side stops working, it throws everything off. But don’t worry — this is usually fixable. And no, you don’t need to rush to the Apple Store just yet.
I’m going to walk you through some easy steps to help you get your AirPods Pro back to normal. Let’s fix that stubborn earbud together and bring back the peace you deserve.
What causes noise cancellation to stop on one side?
#1 Dirty ear tips can block sensors
If you’ve been using your AirPods regularly (and who isn’t?), there’s a good chance that earwax or dust has built up on the tips.
This stuff can block the sensors, and when that happens, noise cancellation just doesn’t work properly.
#2 Outdated firmware might be the issue
Your AirPods run on software too, and just like your phone, they need updates. If the firmware is outdated or gets stuck during an update, one side might stop working properly. Keeping them updated helps fix bugs and improve performance.
#3 Misconfigured settings can throw things off
Sometimes, one AirPod might be set up differently than the other. It could be something small in the settings that’s messing with the balance. A quick check can fix that.
#4 Physical damage could be the cause
Have you dropped your AirPods recently? Even a small bump can cause internal damage. Cracks or broken parts might stop noise cancellation on one side.
If any of these sound like what you’re dealing with, don’t worry. Let’s go through the solutions together and fix the problem step-by-step.
How to fix one side of your AirPods Pro not cancelling noise
#1 Clean your AirPods Pro ear tips
This is the easiest place to start. A little dirt can mess up everything. If the ear tips are dirty, the sensors can’t detect your ears properly, and that stops noise cancellation from working.
Here’s how to clean them:
- Remove the ear tips from your AirPods gently.
- Use a soft, dry cloth to wipe away visible dirt or wax.
- Rinse the tips under water if needed, but never soak your AirPods.
- Let them air dry completely before attaching them again.
Once they’re clean and dry, put them back on and test the noise cancellation again.
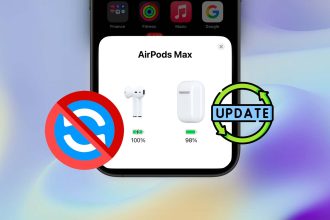
#2 Update your AirPods firmware
If cleaning didn’t help, let’s make sure your AirPods are running the latest firmware. Apple pushes updates that can fix bugs — including issues with noise cancellation.
Here’s how to check and update:
- Put your AirPods in the charging case and leave the lid open.
- Connect the case to power using a Lightning cable.
- Place your iPhone nearby with Bluetooth on.
- Leave them like that for at least 30 minutes. Updates happen automatically.
You won’t see a “progress bar,” but this silent update often fixes weird bugs.
#3 Reset your AirPods Pro
Still no luck? Let’s try a full reset. It’s like a fresh start. This can clear up any software hiccups that might be causing the imbalance.
Follow these steps:
- Put both AirPods in the case and keep the lid open.
- Press and hold the setup button on the back of the case.
- Wait for the light to flash amber and then white.
Now, reconnect your AirPods to your iPhone and test the noise cancellation again.
#4 Double-check your noise cancellation settings
Sometimes, it’s just a setting that got changed. Let’s make sure both AirPods are set to use noise cancellation.
Here’s what to do:
- Open your iPhone Settings.
- Go to Bluetooth and tap the “i” icon next to your AirPods.
- Select Noise Control and make sure it’s set to Noise Cancellation.
- Make sure both AirPods are in your ears when testing this.
If only one side is working, this might fix it instantly.
#5 Look for any physical damage
It’s time for a close look. If one AirPod has been dropped, stepped on, or gotten wet, that might be the issue.
Here’s what to check:
- Inspect both AirPods for cracks, dents, or unusual marks.
- Listen carefully — does one side sound muffled or distorted?
- If anything looks off, it might be time to contact Apple Support.
Unfortunately, no amount of cleaning or resetting can fix physical damage. But if everything looks good, let’s try a few more things.
Other tips you should try
1. Try Apple’s Service App. Apple has a built-in tool that can help. Open the Apple Support app and run a diagnostic on your AirPods. It might spot something you missed — and guide you to a solution faster.
2. Keep an eye on battery levels. Sometimes one side just has less charge. If that earbud’s battery is low, noise cancellation might stop working. Make sure both sides are fully charged before testing again.
3. Test on another device. Pair your AirPods with a different phone or tablet. If the problem goes away, the issue might be with your original device, not the AirPods themselves.
4. Turn off other Bluetooth devices. Nearby Bluetooth devices can cause interference. Shut them off and see if that helps. It’s a small step, but it makes a difference.
5. Update your iPhone or Mac. Keeping your other devices updated is just as important. Updates often fix bugs that affect connectivity or performance.
The Takeaway
Having one side of your AirPods Pro lose noise cancellation is frustrating. It messes with your focus and your peace. But the good news? Most of the time, it’s something simple — like dirt, a setting, or a software glitch.
We walked through cleaning your earbuds, updating the firmware, checking the settings, and even doing a full reset. If none of those worked, you’ve still got Apple’s tools and support to help you out.
Just remember this: Don’t give up too soon. A little patience and a few smart steps can bring back that perfect sound. And if you’ve got a tip that worked for you, drop it in the comments — I’d love to hear it!


