So, your iPad is acting up. Maybe it’s stuck on the Apple logo, not turning on, or just not responding when you tap the screen. Annoying, right? You’re probably thinking, “Do I need iTunes to fix this?” But here’s the good news—you don’t.
Sometimes, your iPad can start misbehaving after a failed update. Or maybe it’s restarting over and over again. And hey, forgetting your passcode happens too. Whatever the issue is, it can feel like your iPad just stopped being helpful.
But don’t worry—you don’t have to use iTunes to fix it. There are easy ways to use recovery mode and get things back to normal. Whether you’ve got a Mac or just want to use other tools, I’ll walk you through it.
Let’s take a look at what could be messing with your iPad and how you can fix it—step by step.
What could be causing your iPad problems?
1. Software updates that didn’t go well
Sometimes updates don’t go as smoothly as they should. You expect new features, but instead, your iPad starts freezing or acting strange. This usually means the update caused a software glitch. It’s frustrating, but it’s also pretty common.
2. Your iPad is stuck in a boot loop
If your iPad keeps restarting and never gets past the Apple logo, it’s caught in a boot loop. You’re stuck watching it turn on and off, again and again. This usually points to a deeper issue in the system.
3. Screen not responding or apps keep crashing
You tap the screen—nothing. You open an app—it crashes. When your iPad becomes unresponsive like this, it’s often a sign that something’s wrong inside the software. Maybe it’s corrupted, maybe it’s overloaded. But it needs fixing.
4. You forgot your passcode
We’ve all been there. You set a passcode, then forget it. Now your iPad is locked, and you can’t get in. This is one of the most common reasons people reset their devices. It’s stressful, but recovery mode can help you get back in.
All of these issues can make your iPad feel useless. But don’t stress. You’ve got options—and you don’t need iTunes to use them.
Fixes & Solutions to Use Recovery Mode on iPad Without iTunes
Alright, now let’s get to the good part—fixing your iPad. You’re going to use recovery mode, but without iTunes. Sounds tricky? It’s not. I’ll show you how.
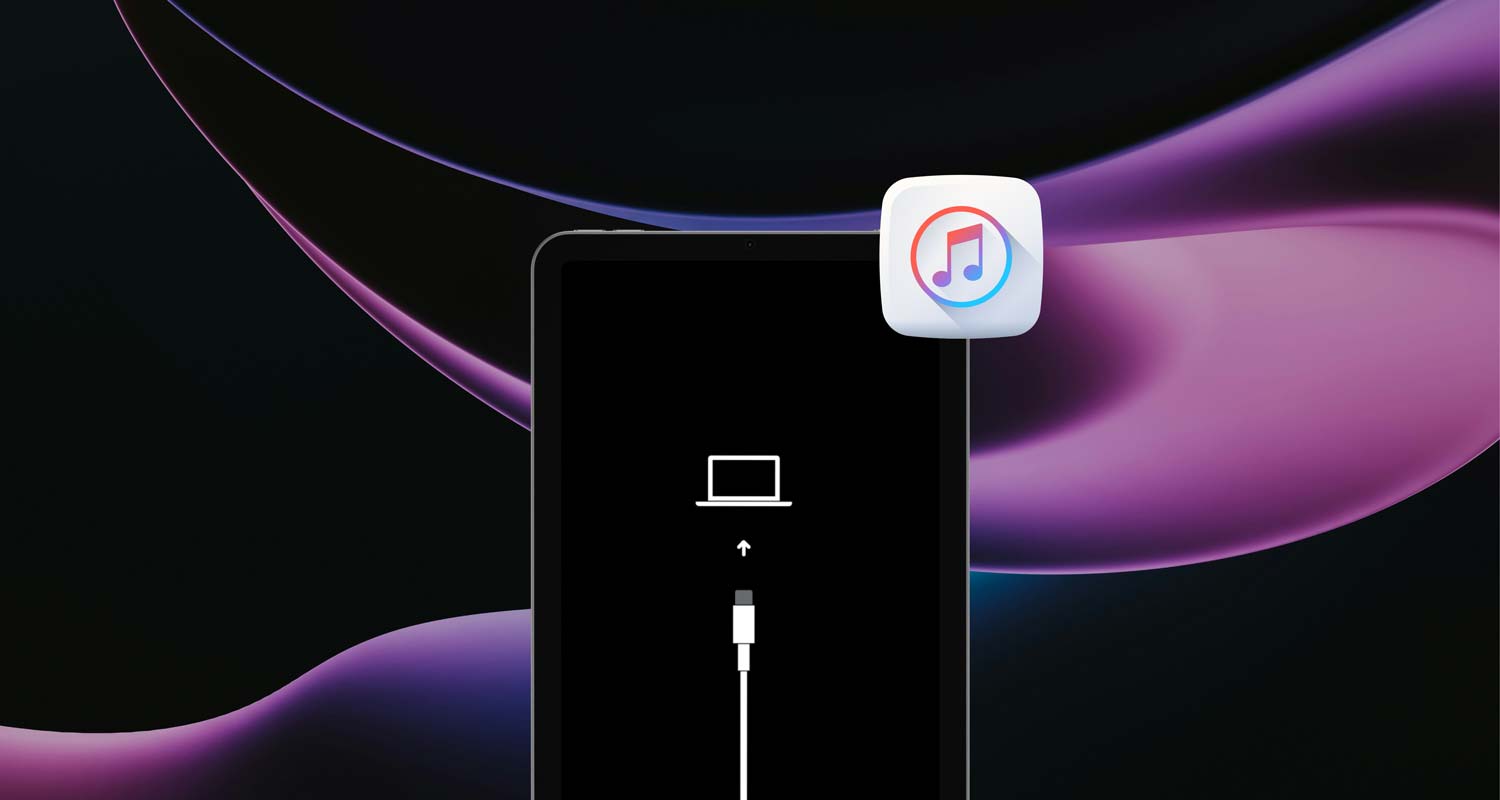
#1 Try using Finder on your Mac
If you’re using a Mac with macOS Catalina or later, you’ve already got what you need. Finder can do everything iTunes used to do.
Here’s how to do it:
- Use a working cable to connect your iPad to your Mac.
- Now, put your iPad into recovery mode. Press and hold the Home button and the Top button (or Volume Up button for newer models) until the recovery screen appears.
- Open Finder on your Mac. You should see your iPad listed in the sidebar.
- Click your iPad and select Restore. Finder will download the latest iPadOS and restore your device.

That’s it. Just follow the prompts, and Finder will take care of the rest. Give it some time, and your iPad should start fresh.
#2 Use third-party software if you don’t have a Mac
No Mac? No problem. There are some helpful tools out there that can walk you through recovery mode.
Here’s what to do:
- Download a tool like Tenorshare ReiBoot or Dr.Fone on your computer.
- Install and open the software. Then, connect your iPad using a good cable.
- The tool will usually prompt you to put your iPad into recovery mode. Just follow the on-screen guide.
- Once in recovery mode, choose the option to Fix or Restore. The software will handle the rest.
These tools are easy to use and don’t need iTunes. Just make sure you pick a trusted one, and you’ll be fine.
#3 Try iCloud if Find My is enabled
If your iPad is still online and you’ve got Find My iPad turned on, iCloud can help you reset it remotely.
Here’s how:
- Go to iCloud.com and sign in with your Apple ID.

- Click on Find My.

- Then select your iPad.

- Click Erase iPad. This will wipe your device and remove any problems.

This is a great option if you’re locked out and don’t have your iPad with you. Just remember—it erases everything. But if you’ve backed up, you’re good to go.
#4 If nothing works, reset with DFU mode
DFU mode is like deep recovery. If recovery mode doesn’t work, this is your next step.
Here’s how to do it:
- Connect your iPad to your computer with a strong cable.
- Quickly press Volume Up, then Volume Down.

- Then hold the Power button until the screen goes black.

- Keep holding Power, and now also hold Volume Down for 5 seconds.

- Let go of Power but keep holding Volume Down for another 10 seconds.

- If the screen stays black and your computer detects the iPad, you’re in DFU mode.
From here, use Finder or a third-party tool to restore your iPad. It’s a bit tricky, but it works when everything else fails.
Extra Tips to Make the Process Smoother
1. Always backup your data first
Before you do anything, make sure your iPad is backed up. You can use iCloud or a third-party tool. Just go to Settings > Your Name > iCloud > iCloud Backup and tap Back Up Now. It’s like insurance—you’ll thank yourself later.

2. Keep your iPad charged
Make sure your iPad has at least 50% battery before doing any recovery steps. If it’s low, plug it in. You don’t want it dying in the middle of a reset.
3. Use a good cable
A lot of issues come from bad cables. If your iPad isn’t connecting properly, try a different cable. Use the original if you still have it.
4. Don’t be afraid to contact Apple
If you’ve tried everything and it’s still not working, reach out to Apple Support. They can walk you through it or help with repairs. You can also book a Genius Bar appointment.
5. Keep your software updated
After you fix your iPad, make sure you keep it updated. Go to Settings > General > Software Update and install any available updates. This helps avoid future problems.

The Takeaway
So, your iPad gave you a hard time—but now you’ve got options. And no, you don’t need iTunes to fix it. Whether you use Finder, a third-party tool, or even iCloud, there’s always a way to get your iPad back up and running.
A lot of people think iTunes is the only way to fix these issues. It’s not. You’ve seen other solutions that are just as effective—maybe even easier.
Now it’s your turn. Give one of these methods a try and see what works best for you. Don’t forget to back up your iPad and keep it updated going forward. You’ve got this.
If you’ve got a question or want to share what worked for you, go ahead and drop a comment below. I’d love to hear how it went.


